Welcome to the world of Adobe Photoshop, where your creative possibilities are virtually endless! Whether you’re a budding photographer, a graphic designer, or just someone who loves to dabble in digital art, mastering the basics of Photoshop can open up a whole new realm of creative potential. Let’s dive into some essential tips and tricks that will help you get started and make the most of this powerful tool.
Getting Started with Photoshop
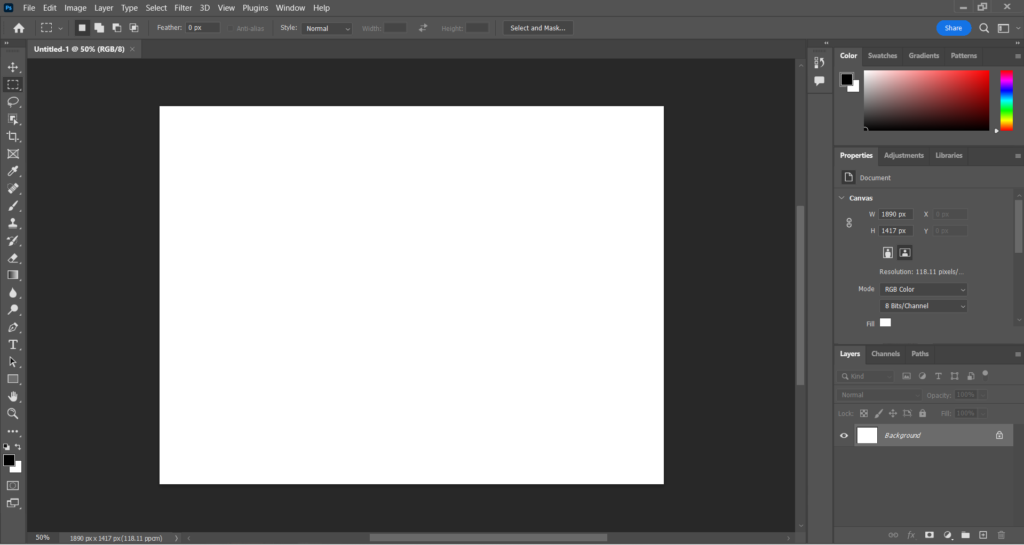
First things first, let’s get comfortable with the Photoshop interface. It might look a bit intimidating at first, but once you know where everything is, you’ll feel right at home.
- Toolbar: This is your main toolkit on the left side of the screen. Here you’ll find all the essential tools for selecting, editing, and creating.
- Options Bar: Located at the top, this bar changes based on the tool you’re using, offering specific options for each.
- Panels: On the right side, you have panels like Layers, Adjustments, and History. These are crucial for managing your projects and making edits.
- Workspace: Photoshop’s workspace is customizable. You can arrange tools and panels to fit your workflow, making it easier to find what you need.
Essential Tips for Beginners
Understanding Layers
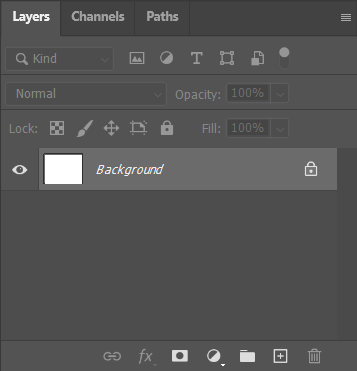
Layers are the backbone of Photoshop. They let you work on different parts of your project separately without affecting the rest of the image.
- Creating Layers: Click the “New Layer” icon in the Layers panel or use the shortcut Shift + Ctrl + N (Shift + Cmd + N on Mac).
- Layer Order: The order of layers determines which elements appear on top. Drag layers up or down to rearrange them.
Layer Masks: Use layer masks to hide or reveal parts of a layer without permanently deleting anything. This is great for non-destructive editing.
Basic Photo Editing
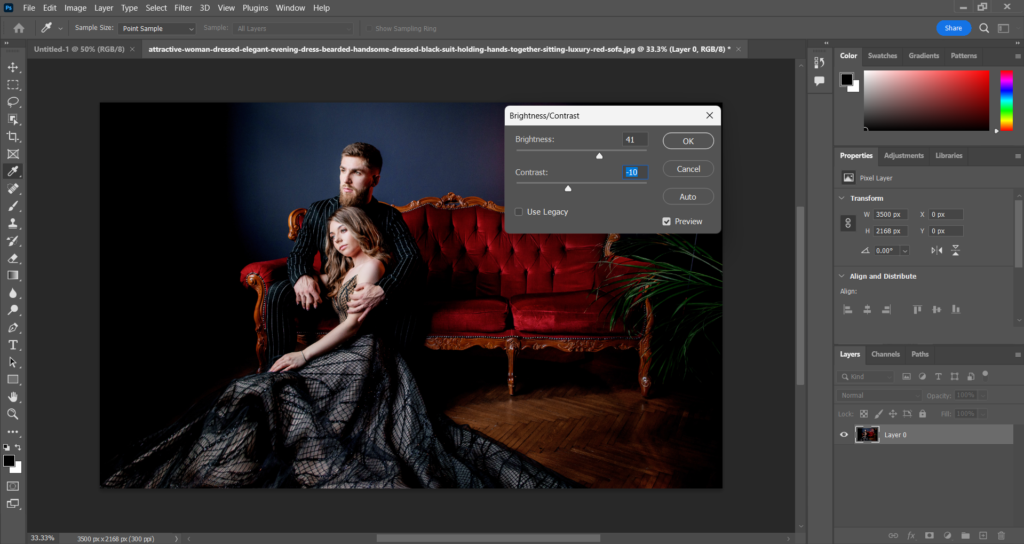
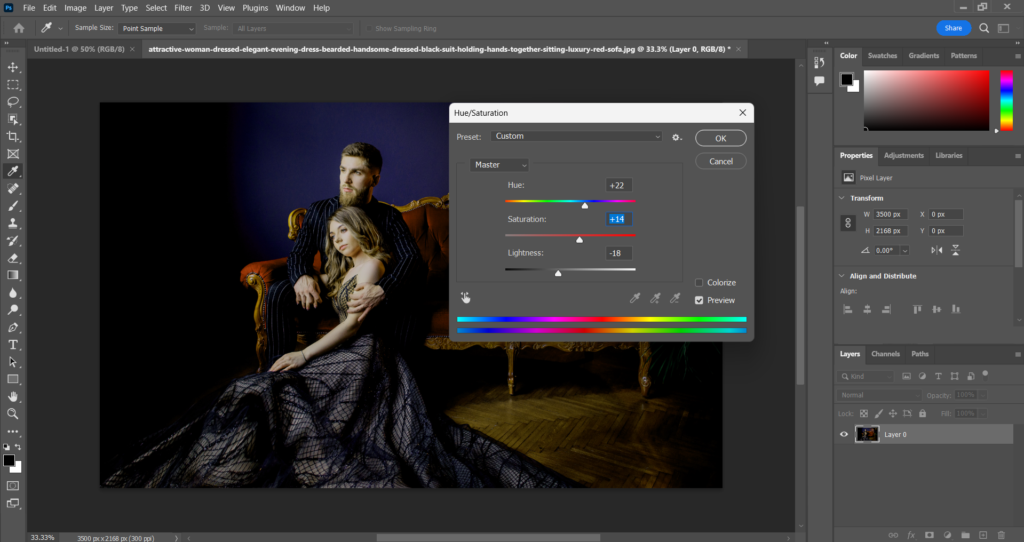
Let’s start with some basic adjustments to enhance your photos:
- Brightness and Contrast: Go to Image > Adjustments > Brightness/Contrast to improve the light and dark areas of your photo.
- Color Correction: Use Image > Adjustments > Hue/Saturation to tweak the colors in your image. For more advanced color correction, check out Image > Adjustments > Curves.
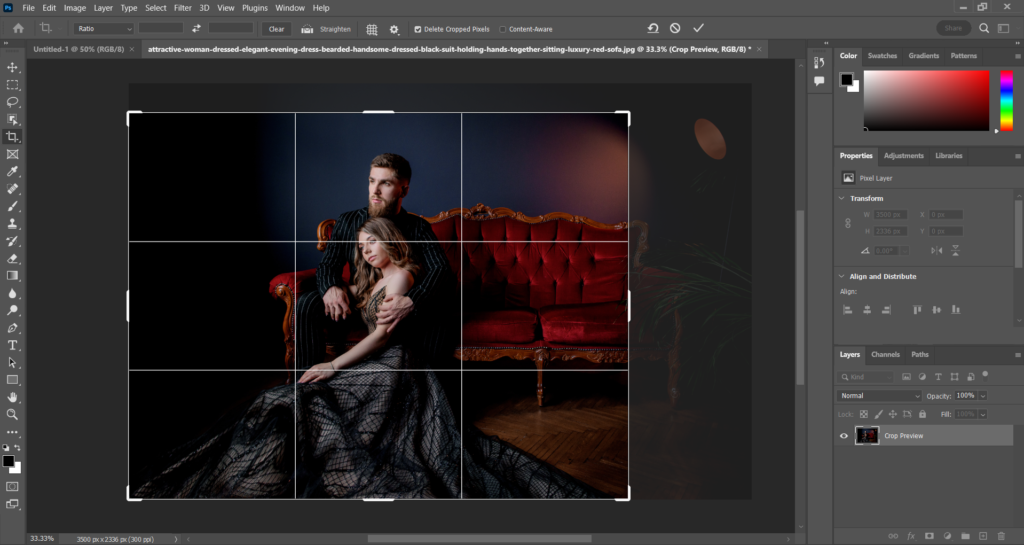
- Cropping: Use the Crop Tool (C) to trim and straighten your images. It’s a simple way to improve composition.
Selections and Masks
Making precise selections is key to editing specific parts of an image:
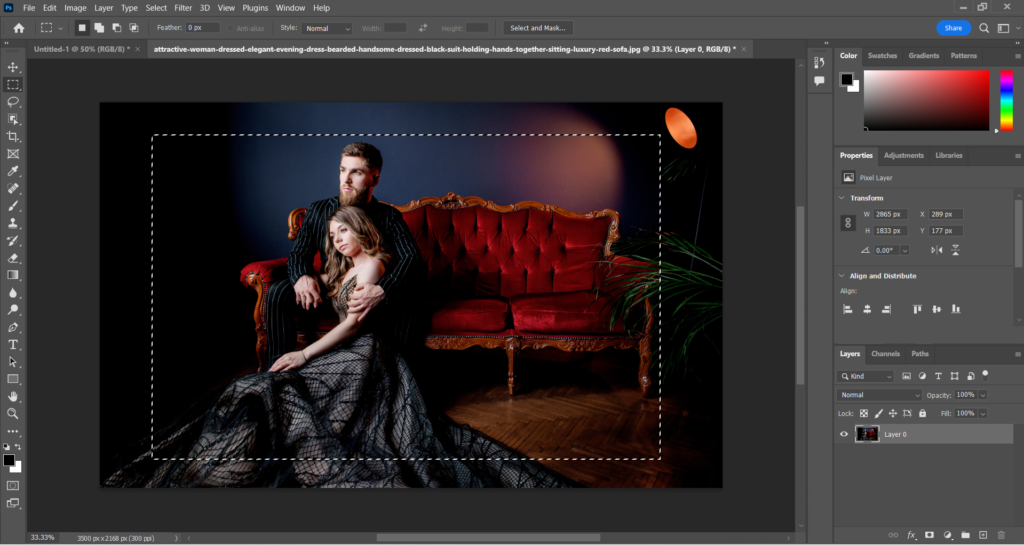
- Marquee Tools: Rectangular and Elliptical Marquee Tools (M) let you select geometric areas.
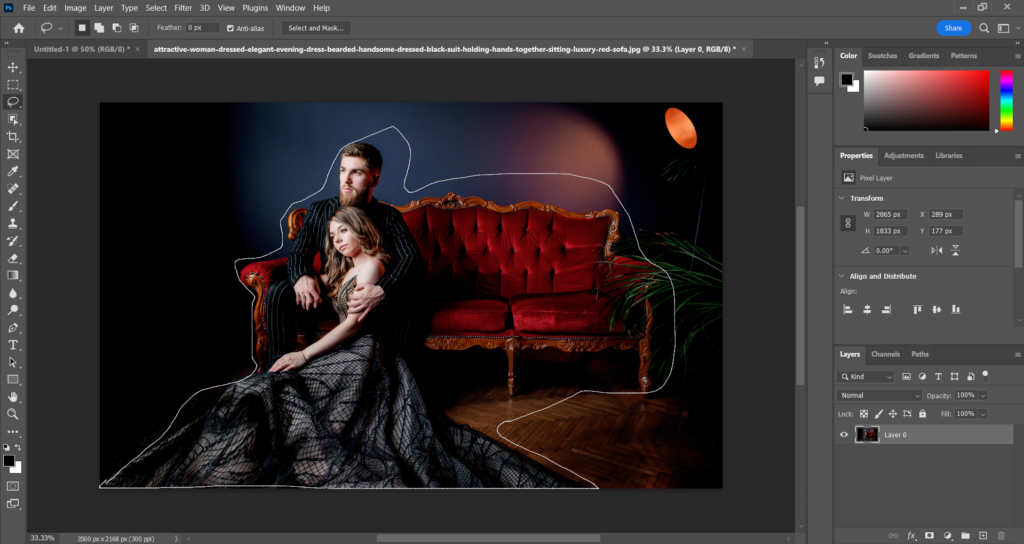
- Lasso Tools: The Lasso Tool (L) is perfect for freeform selections, while the Polygonal Lasso Tool is great for straight-edged selections.
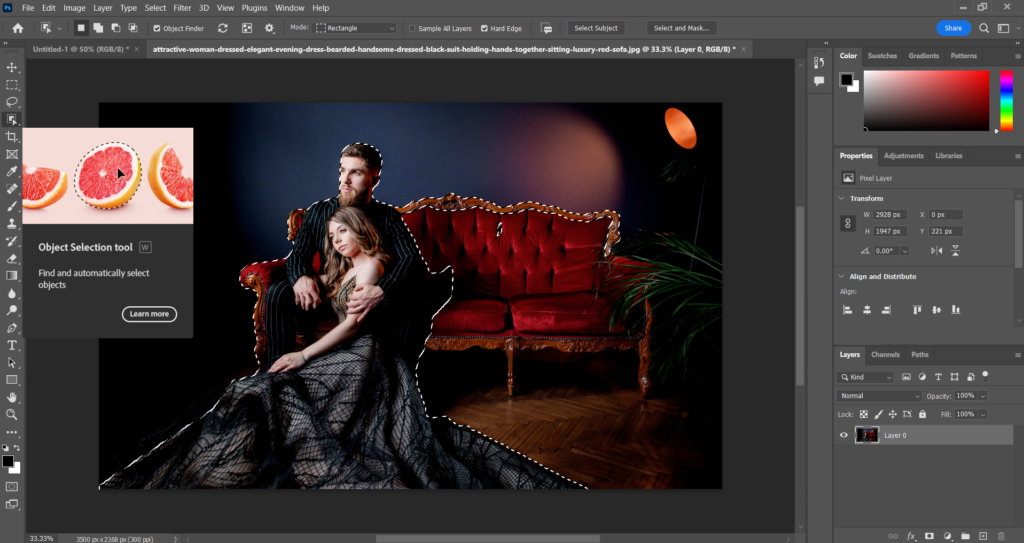
- Object Selection Tool(W) : Using this tool will make the prime object automatically detectable within it’s selection area.
Brushes and Painting
Brushes are incredibly versatile tools for painting, retouching, and more:
- Brush Tool: Select the Brush Tool (B) and adjust the size and hardness in the Options Bar.
- Custom Brushes: Create your own brushes by defining any shape or texture as a brush. Go to Edit > Define Brush Preset.
- Eraser Tool: The Eraser Tool (E) acts like a brush but erases instead of paints. Remember, it’s permanent unless you use a mask.
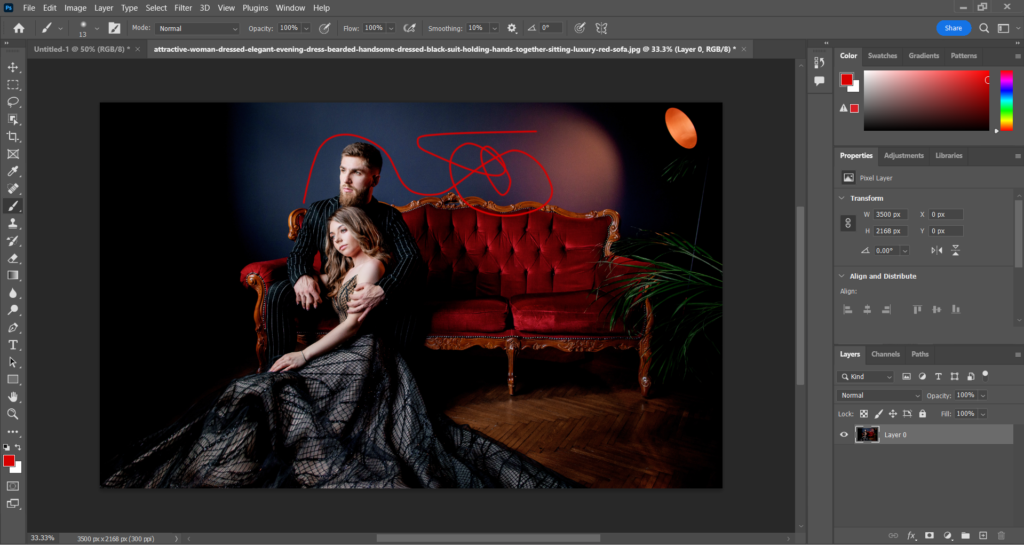
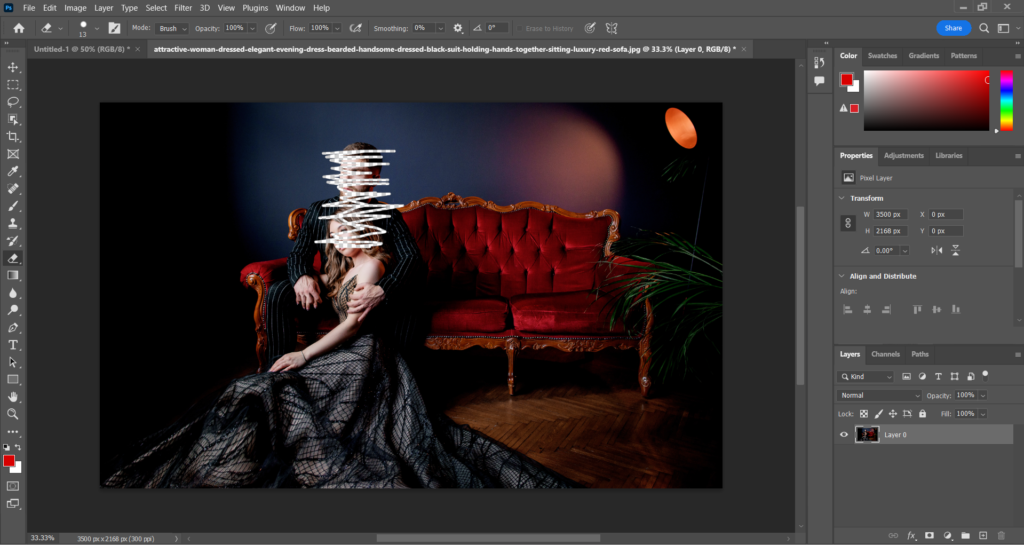
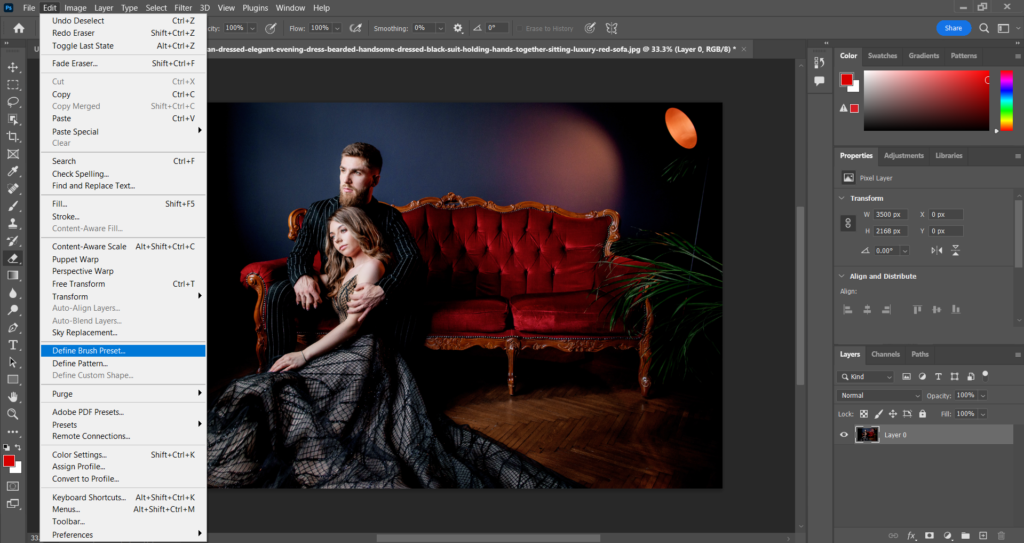
Read this part very carefully to understand the advanced part of the Photoshop!!!
Text and Typography
Adding text to your images is straightforward with Photoshop’s Type Tool:
- Type Tool: Select the Type Tool (T), click on your canvas, and start typing. Use the Options Bar to change font, size, color, and alignment.
- Text Layers: Each text element gets its own layer, making it easy to edit and move.
- Warp Text: Use the Warp Text option in the Options Bar to apply different styles and effects to your text.
Filters and Effects
Photoshop offers a variety of filters and effects to enhance your images:
- Filters: Access filters through the Filter menu. Common filters include Blur, Sharpen, and Noise.
- Smart Filters: Convert layers to Smart Objects (Layer > Smart Objects > Convert to Smart Object) before applying filters for non-destructive editing.
Non-Destructive Editing
Keep your original image data intact while editing:
- Adjustment Layers: Use adjustment layers for edits like brightness, contrast, and color changes. They can be modified or removed at any time.
- Smart Objects: Convert layers to Smart Objects for non-destructive scaling and applying filters.
- Layer Masks: Use masks instead of erasing parts of a layer. This way, you can hide or reveal parts of the layer non-destructively.

- Keyboard Shortcuts
Learning shortcuts can save you a ton of time. Here are a few essential ones:
- Ctrl + J (Cmd + J): Duplicate layer.
- Ctrl + T (Cmd + T): Transform (resize, rotate).
- Ctrl + Z (Cmd + Z): Undo.
- Ctrl + Alt + Z (Cmd + Option + Z): Step backward through history states.
- Using Guides and Grids
Guides and grids help with precise placement and alignment:
- Show/Hide Guides: Use Ctrl + ; (Cmd + 😉 to show or hide guides.
- Create Guides: Drag from the rulers onto your canvas to create guides. Enable rulers with Ctrl + R (Cmd + R).
- Customizing the Workspace
Tailor the Photoshop workspace to fit your needs:
- Save Workspace: Arrange tools and panels, then go to Window > Workspace > New Workspace to save your layout.
- Use Presets: Photoshop offers different workspace presets for various tasks, such as photography, painting, and web design.
Getting the hang of Photoshop can feel a bit overwhelming at first, but with some practice and patience, you’ll be amazed at what you can create. Start by mastering the basics—understanding layers, making selections, using brushes, and applying filters. As you get more comfortable, you’ll find yourself exploring more advanced features and techniques. Keep experimenting, have fun, and don’t be afraid to make mistakes. Happy editing!

